
Craftin' Marbled Clay Coasters
At the beginning of November my friend Celary asked if I’d like to do some crafting together. Her sister had bought a 3-month subscription with Craftosity for her birthday and she wanted to try them out with me. It was nice to try something new and face to face with someone rather than via a screen which is what Lynz and I have been doing for our last sewing sessions.
Craftosity is a monthly craft kit subscription that allows people to try a new craft every month. The box includes all the tools and materials you’ll need, clear step-by-step photo instructions, an online video tutorial and something for your pinboard.
Image credit: Craftosity’s October Kit
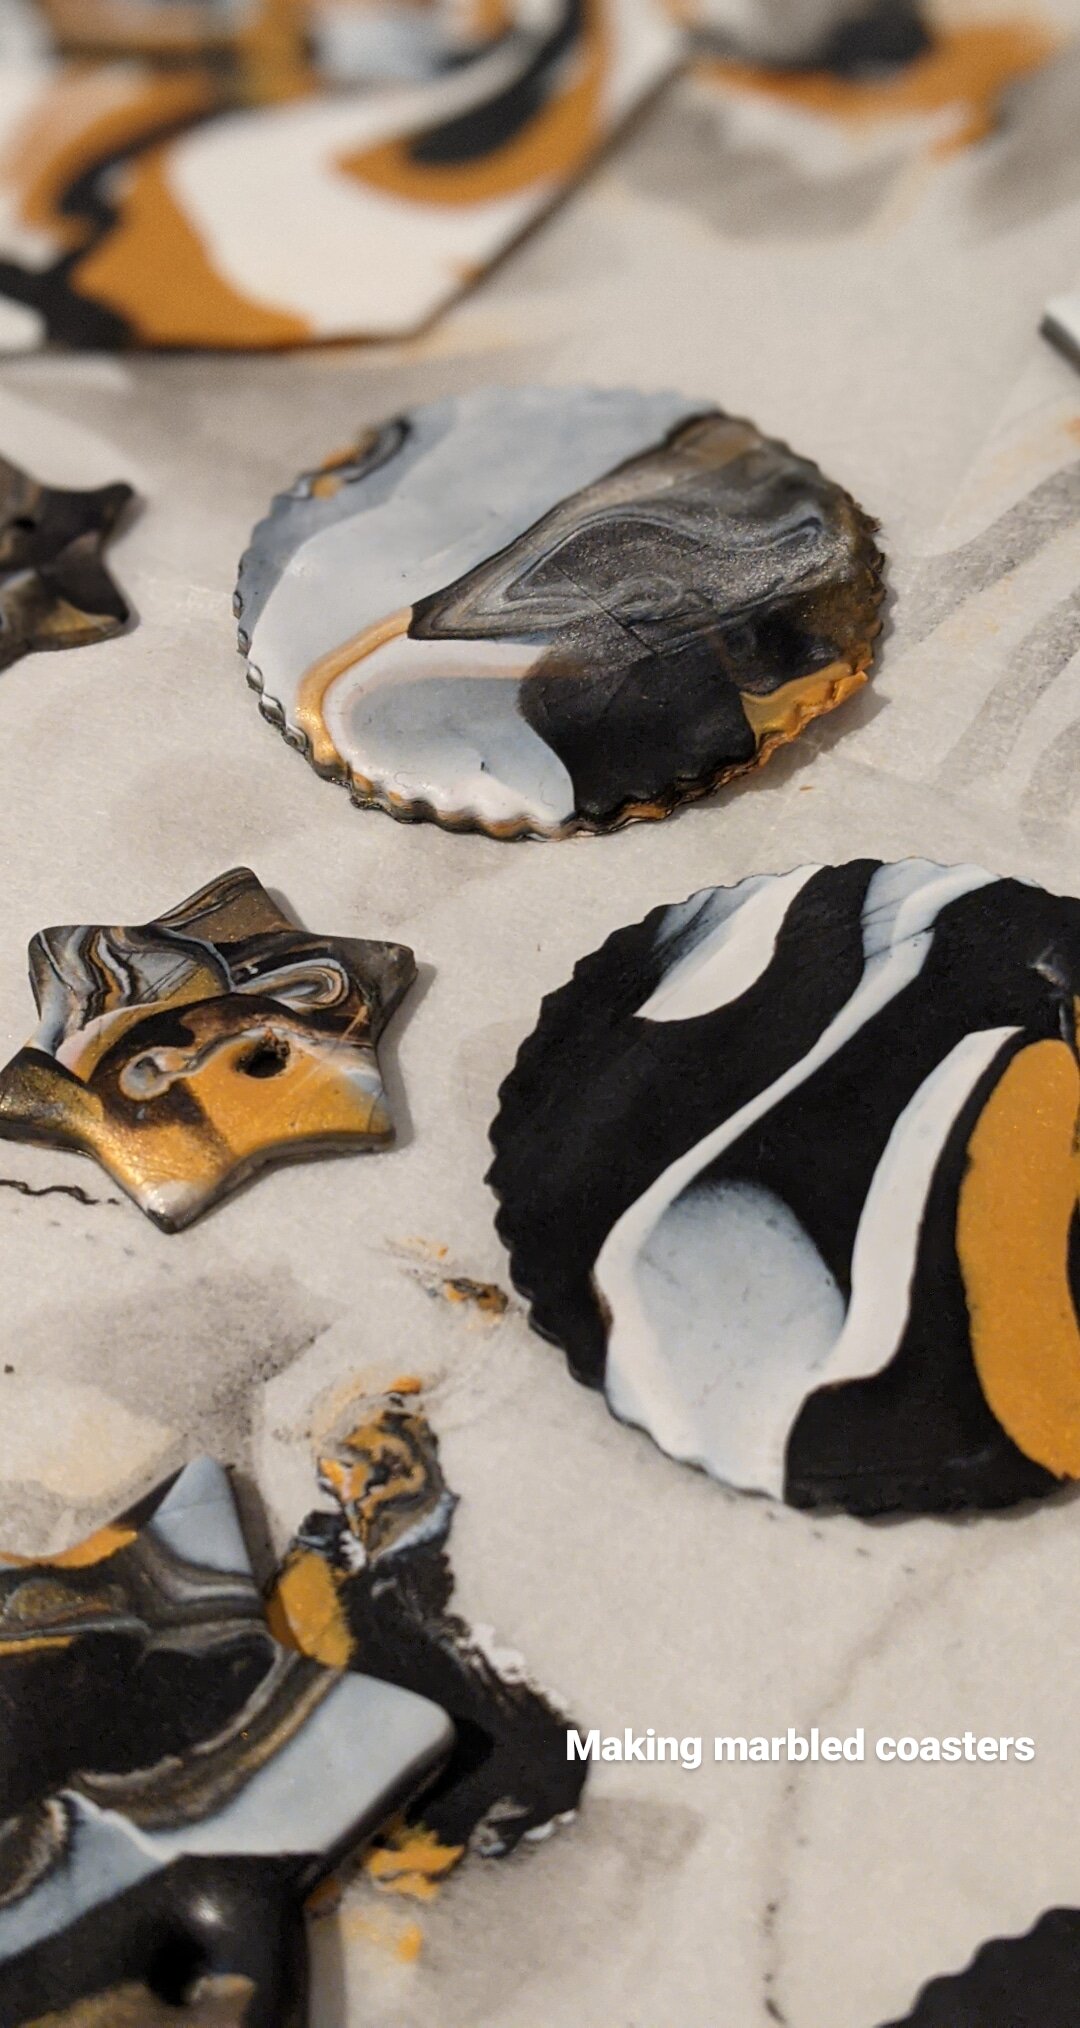
This box was posted in October but we had only just got round to trying it out. There was enough material to create 4 coasters (2 white marble and 2 black marble). The kit included:
White Modelling Clay
Gold Modelling Clay
Black Modelling Clay
Wooden rolling pin
Sandpaper
Card cutter
Parchment
Template
Step-by-step photo instructions
The idea is that you’ll use the three colours of clay provided to create a unique marble effect by twisting them around each other and rolling them out. Because we ended up splitting the equipment in half, my friend and I decided not to use the template provided but used smaller cookie sized cutters instead. This way we also had the choice of choosing not only different size cutters but shapes too. When finished, we put our coasters in the oven for 30 mins at 100c fan to bake.
In the instructions they warn that the clay is quite porous and will absorb any spills or wetness from cups and mugs. To help the durability of my coasters, I glazed them with a mix of water and pva glue at a 3:1 ratio. If you don’t have any pva glue, then Mod Podge would also be fine to use or you could try other varnishes.
This was a really fun afternoon project to do with my friend; I’m really glad to have tried this with her. The instructions were really clear and easy to follow, so we didn’t end up watching the video tutorial. At the start using opposite colours of the colour wheel helped give stark results but as you worked the clay more the colours bled into each other, truly giving you a unique feel to each.
I would say that before rolling out your clay put something like a plastic sheet down or even better a silicone mat; don’t use the parchment paper provided because the micas in the clay really transfer. I used a bin liner to help protect my surface. I would also recommend using a ceramic rolling pin or a glass bottle, as I found that when the clay became warm, it would stick to the rolling pin and peel off in weird places. I ended up using a glass bottle (Elderflower drink concentrate from IKEA) that I had to hand, and even though it didn’t give me the flattest clay surface, I could still peel it off the bottle easily enough.
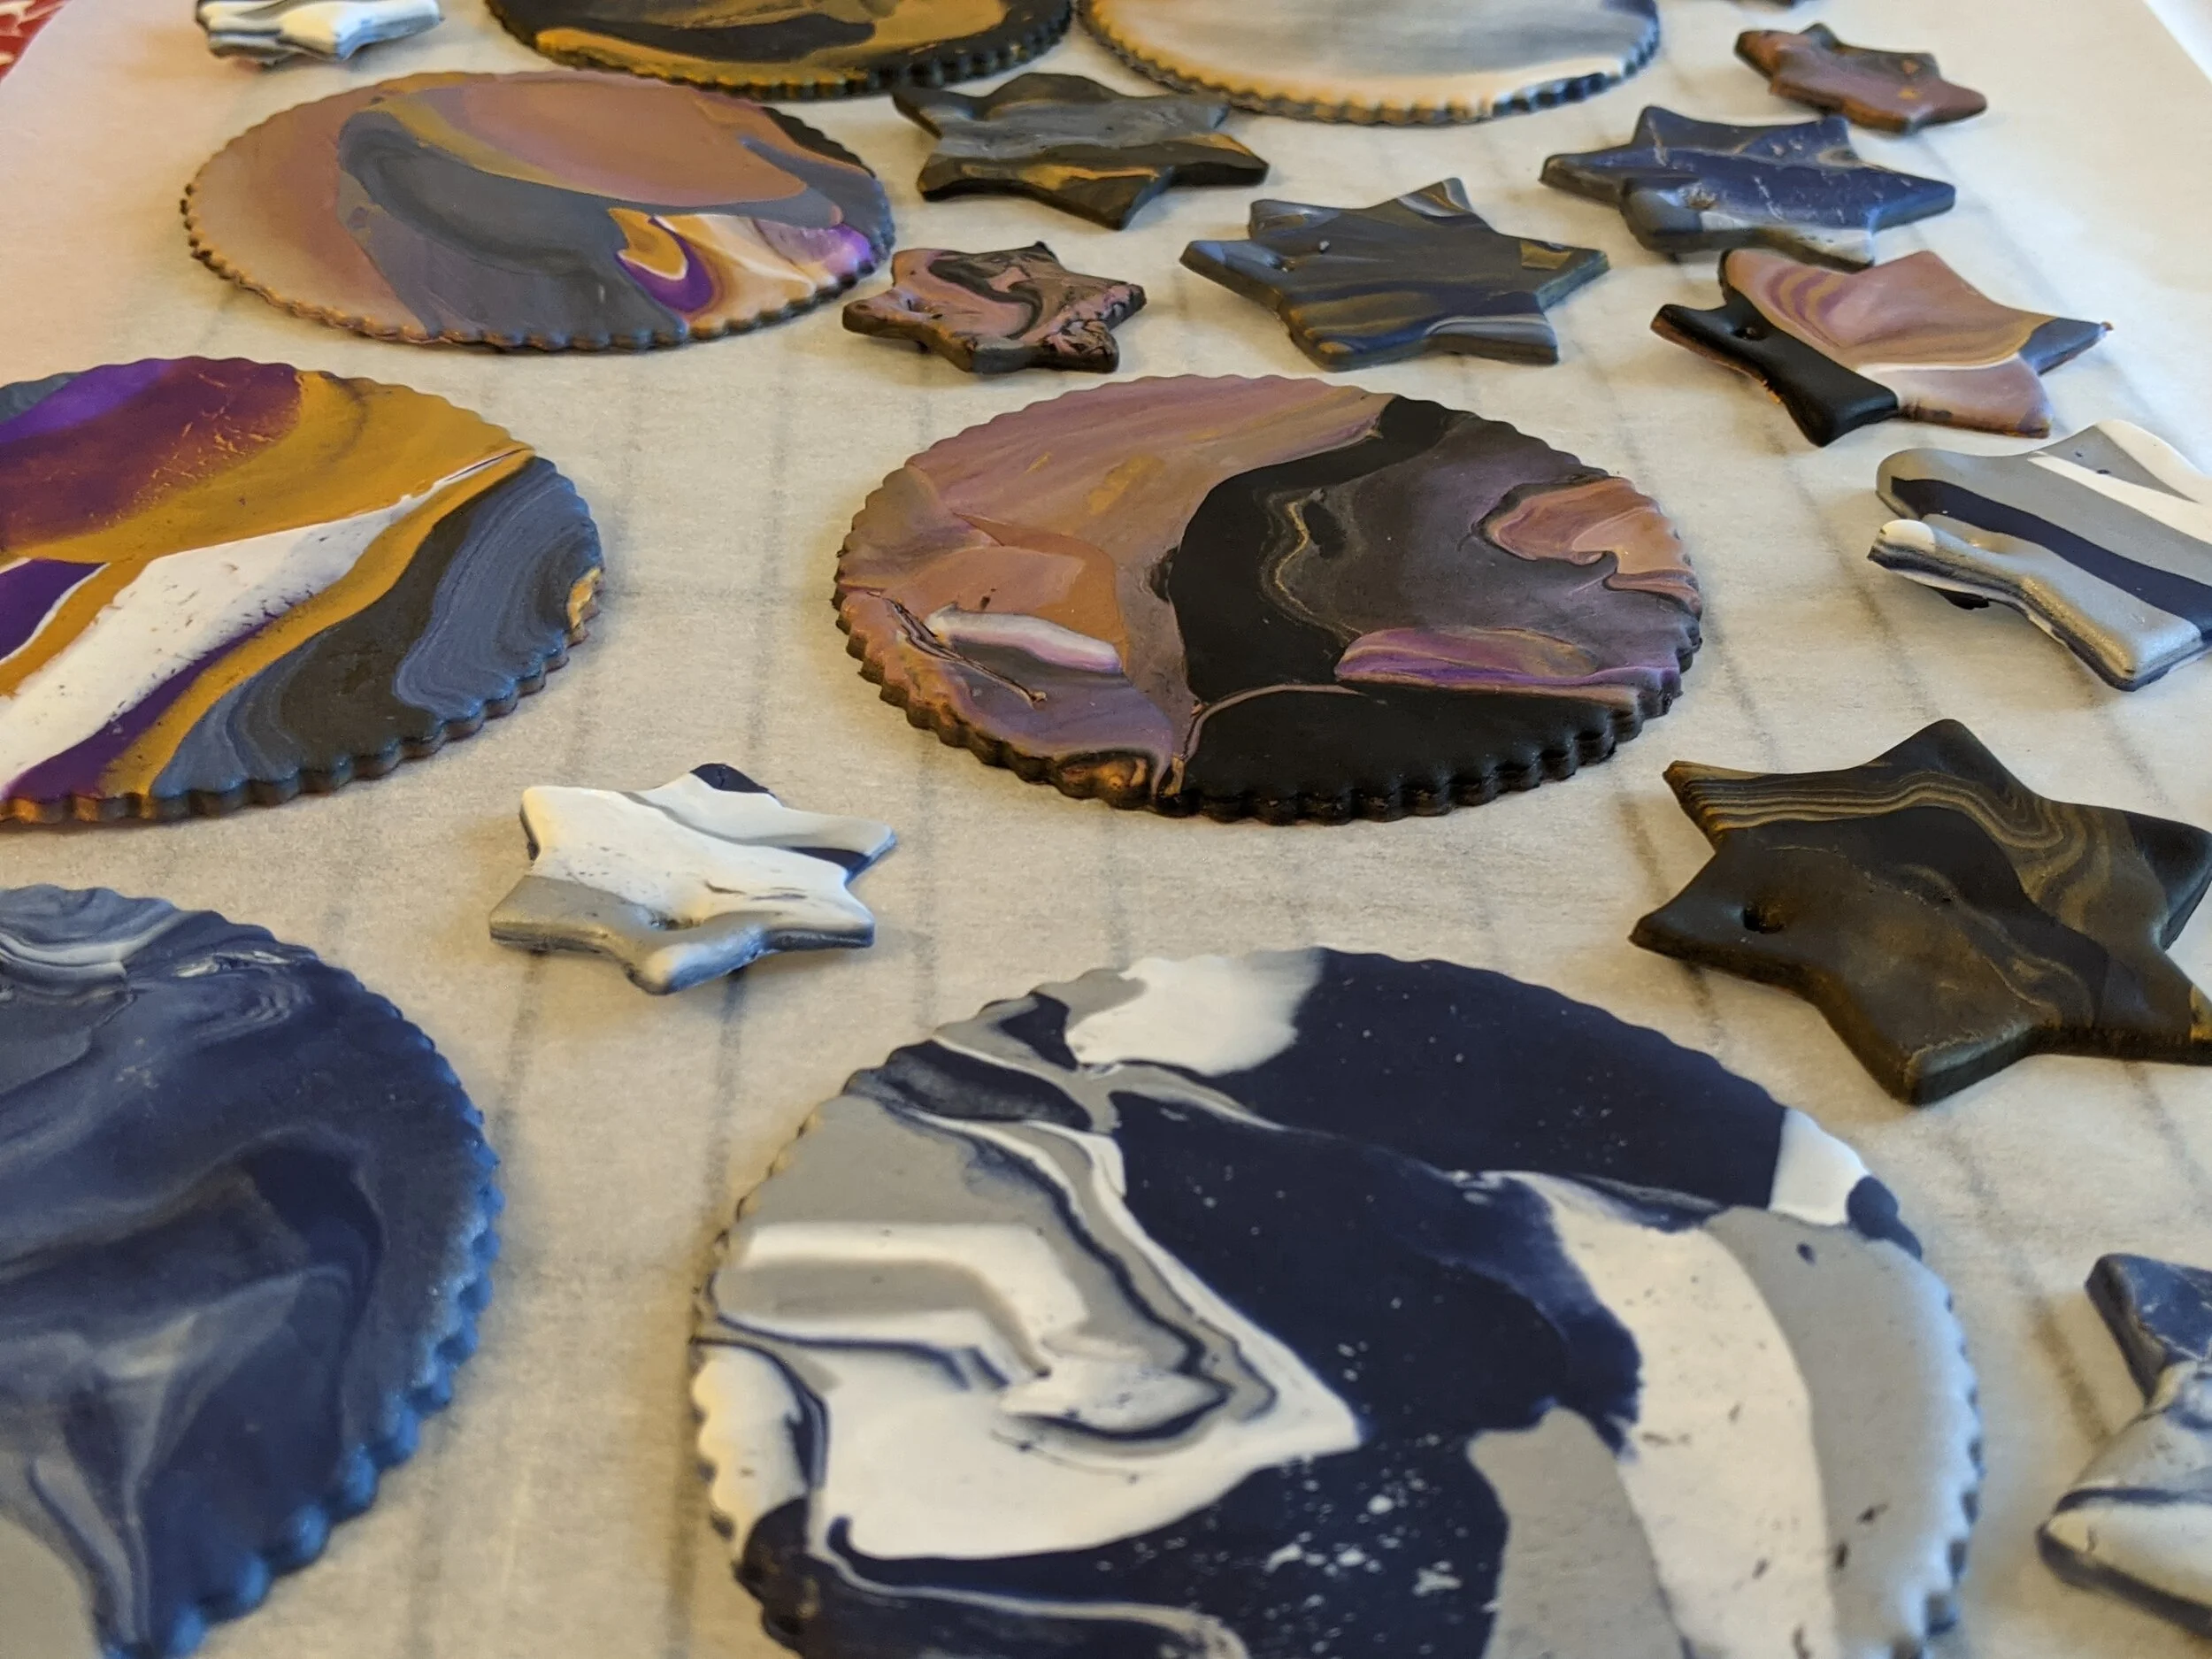
I enjoyed the project so much that I bought additional clay to carry on making my own. I stuck with the main colours of white, black and gold but also bought Winsor Blue (dark blue), Plum (purple), Emerald (green) and Silver. I was a little disappointed in the plum and emerald colours because they weren’t as dark as every website had pictured, but as we had just entered our second lockdown I wasn’t going to quibble.
Here are a few of my coasters with various colours in them:

If you would like to try Craftosity, you can get £5 off your first box with the code: FRIEND-197A

